
Creating a Nila Account
Create a Nila account to start designing with AI, collaborate with your team, and take your work from prompt to production-ready code.
Note: Once you’re granted early access to Nila, you can sign up and create your team to get started.
Sign Up for Nila
To create your account:
Go to the Nila website and select Request Early Access.
Submit your request for early access.
Once you’re granted access to Nila, follow the link in the email you receive to sign up.
Enter your email address, password, and phone number.
Review and agree to the Terms of Service and Privacy Policy.
Select Sign Up Now.
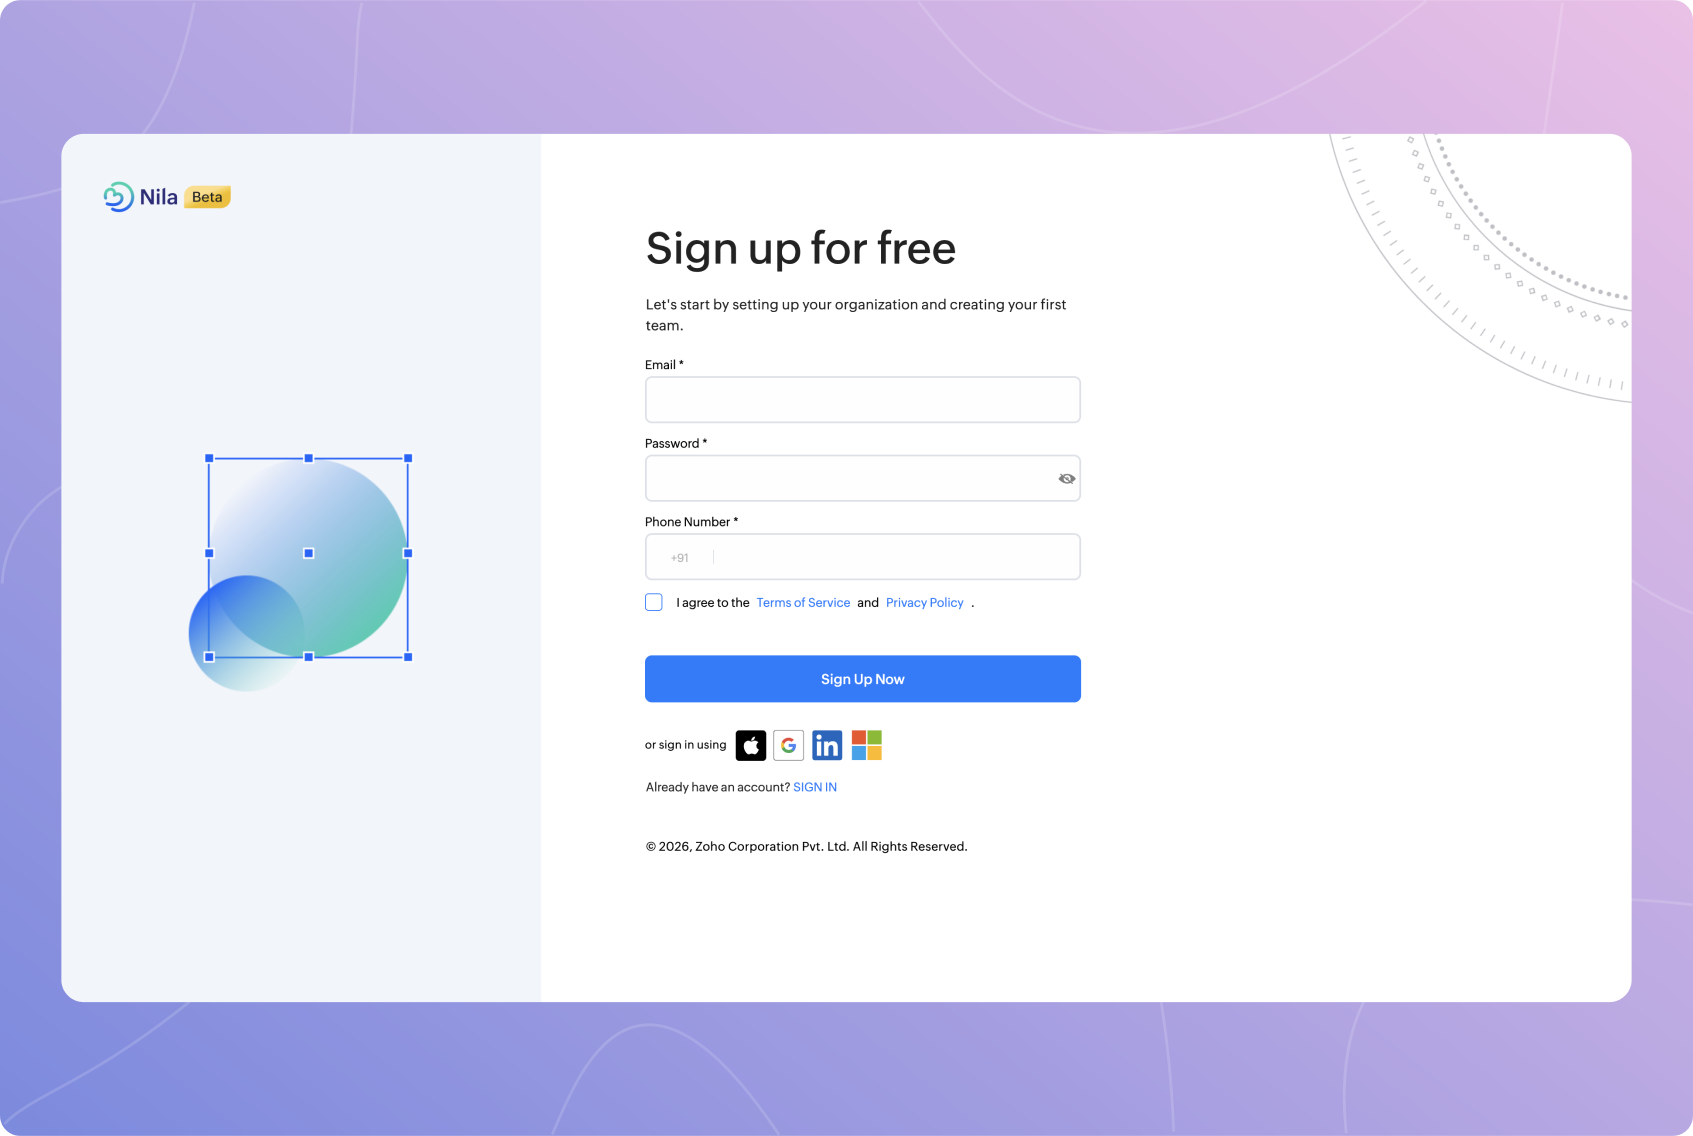
You can also sign up using your Apple, Google, LinkedIn, or Microsoft account.
Verify Your Sign-up
After you sign up, Nila sends a one-time password (OTP) to the mobile number you provided.
To verify your sign-up:
Enter the OTP on the Verify your sign-up screen.
Select Verify.
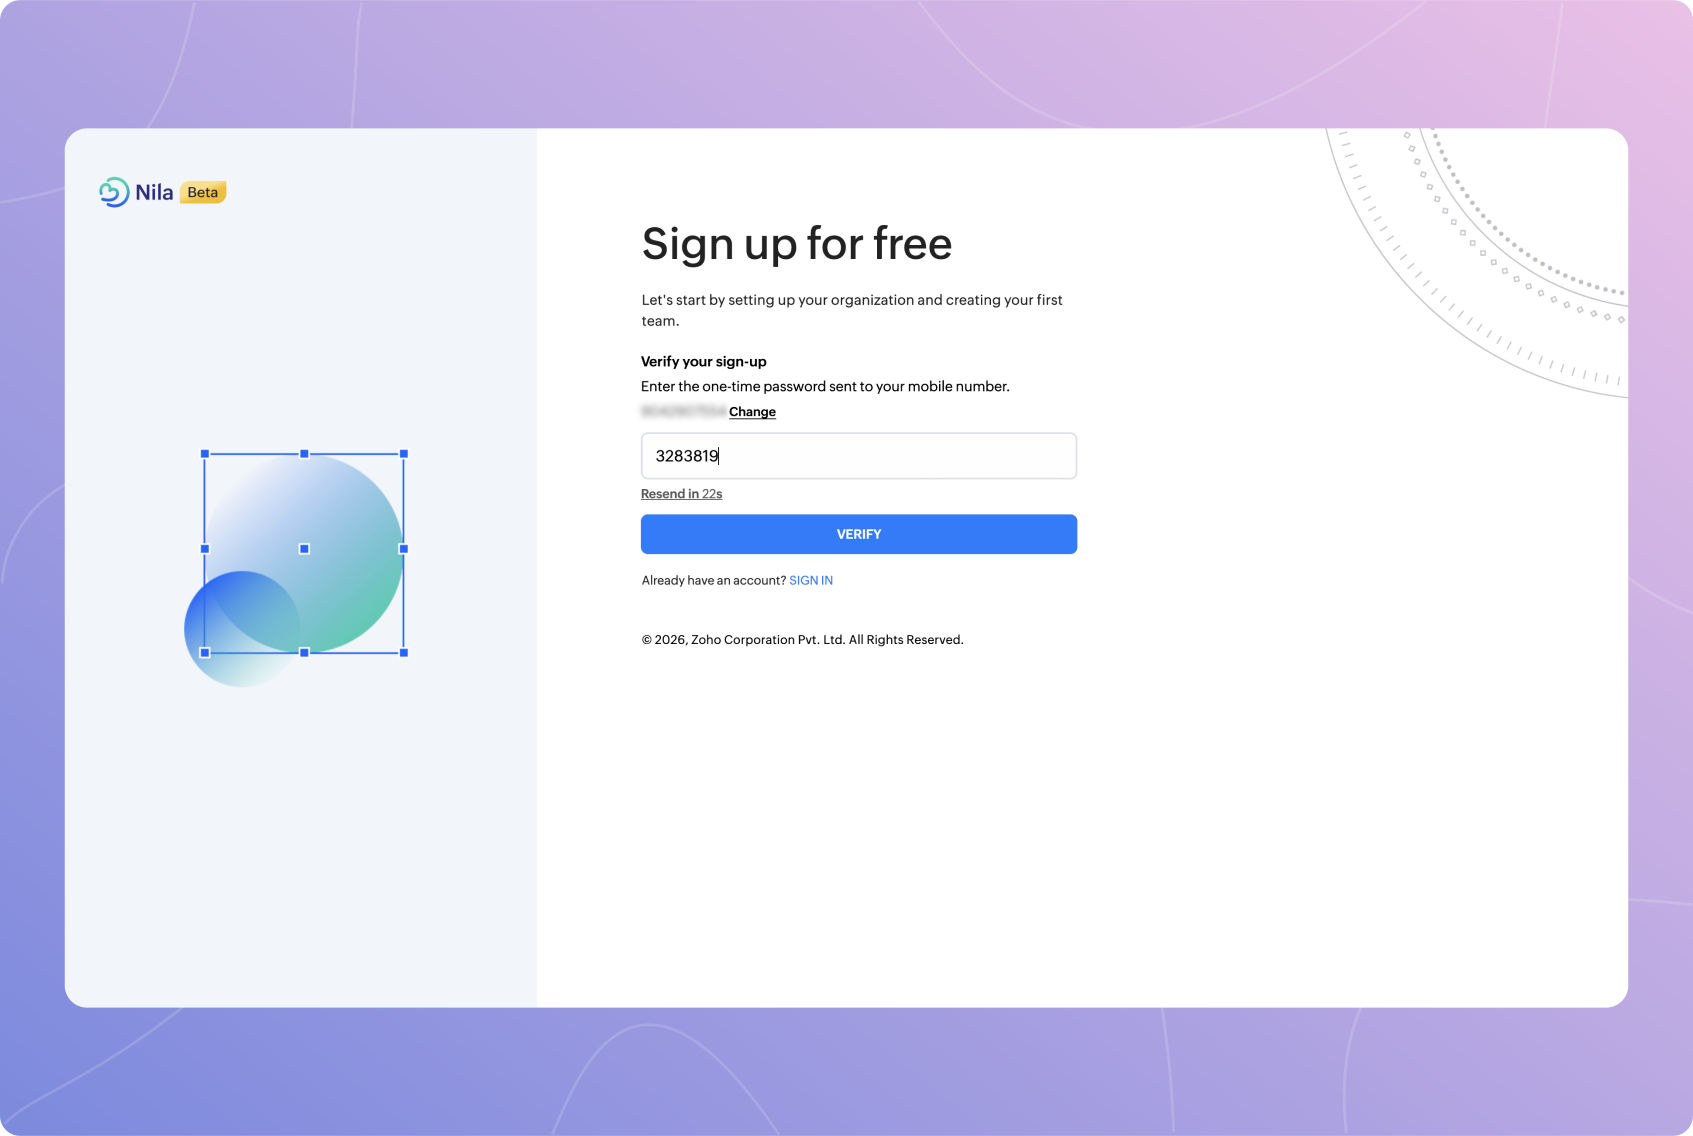
If you don't receive the OTP, select Resend to request a new one. You can also select Change to use a different mobile number.
Set Up Your Team
Once your sign-up is verified, you’ll be asked to create your first team.
Your team is where you can create projects, save your work, and collaborate with others in Nila.
To set up your team:
Enter a name for your team.
Select Get Started.
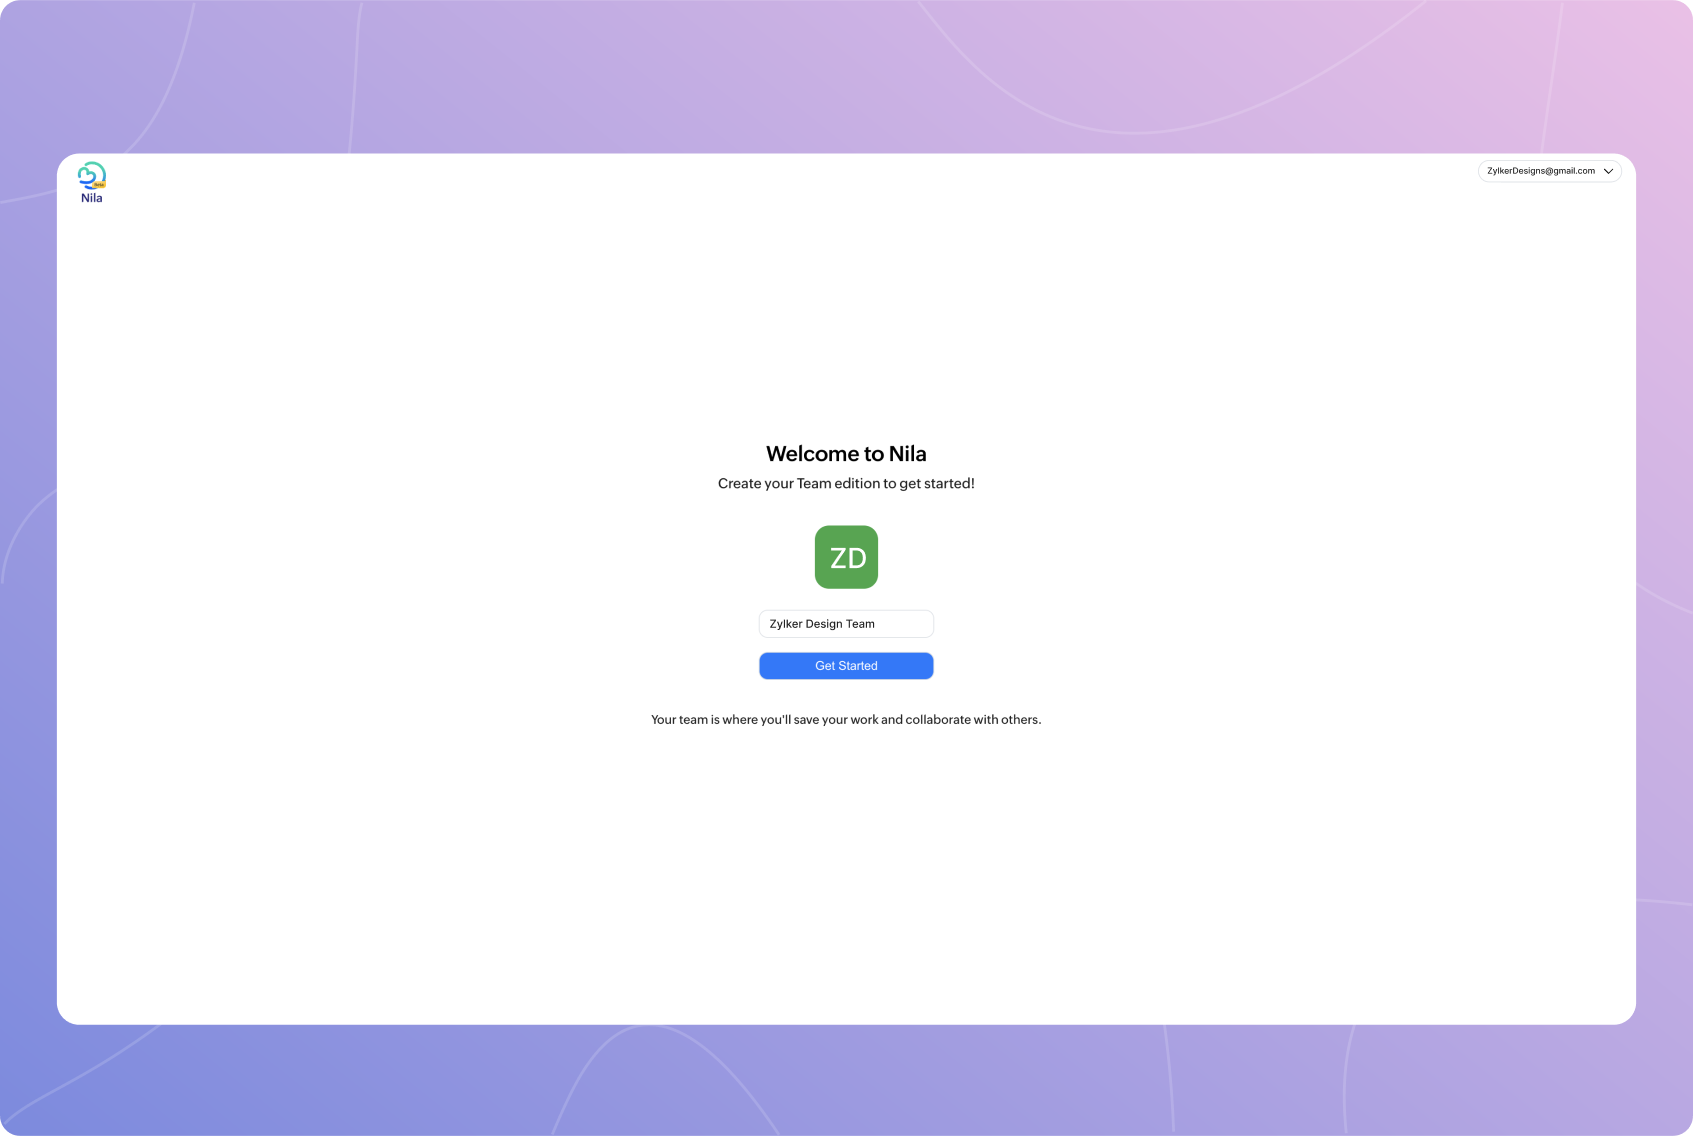
Once your team is created, you’ll be taken to your Nila workspace.
From there, you can create your first project and start designing with Nila.
Found this helpful?

Can't find what you need?
Try refining your search or explore our Help Center
